Showing posts with label Tricks. Show all posts

Wednesday, October 06, 2010

Hal grades your bicycle locking skills

Elizabeth from BikeCommuters.com posted this to Facebook today. Hal is a wrench at a popular Manhattan bike shop. He takes to the mean steets and criticizes bad bicycle locking jobs.


In short, he's looking for 3 things:

  1. Use a really sturdy chain and lock (not a cable) to secure your frame to a large, immovable object.
  2. Make sure both wheels are secured to the frame or to the immovable object with more than just the axle nuts or QR skewers.
  3. Make sure the seat is properly secured (again, with something more than the seatpost collar)
I usually don't worry about my seat when I park at work. I have a thick towing chain that I pass through both wheels and the rear triangle, then around the bike rack. If I'll only be in and out (like the grocery store) I'll often use a cable lock, but I'll pass it through both wheels, the frame and the seat rails before attaching it to the rack. In higher risk areas (such as when I was riding to a not-so-great part of downtown Kansas City, MO for my monthly check-in at the unemployment office), I use both techniques at the same time.

Hal's comment on quiet streets generally being safer is generally spot-on, but you could be asking for trouble if your lock-up spot is too secluded and you frequently lock up there for long periods of time. He also discusses the fact that locks only buy you time. As a security guy, I would say that it's more complicated than that, but not by much.
  • If someone really wants YOUR bike (because it's the most expensive one they came across, because they hate you, or because it's the only bike around), then locks only buy you time.
  • If someone just wants something easy to steal (including individual bike wheels, seats, etc) and yours is locked up better than the others in the area, thieves will usually choose the easier target.
It's not as big of a problem in Kansas City as it is in larger metro areas, but bicycles are generally a commodity on the street. A working bicycle can be traded for about $25-$50 in goods or services unilaterally on the black market. It doesn't matter if it's a discount-store Bike-Shaped-Object or a carbon fiber track bike. Generally speaking, though, thieves are willing to put a little more work (and risk) into making extra money out of nice bikes by parting them out and fencing them or by trying to sell them as if they're the owner, either in person or on sites like Craigslist.

I'd still like to know where Hybridzilla ended up. I checked all the pawn shops, all the online places and the local newspaper want ads. I like to think it found its way to someone that appreciates and rides it much as I did. It was purpose-built for getting around reliably.

Random Tunage:
Derek Howell - Frozen
Cascade - Escape

Saturday, December 12, 2009

Tricks Of The Trade: Warmness

Elizabeth and I have been cranking out some tips for winter commuting over at BikeCommuters.com:

Toes Froze?

Cold Hands?

Snow Biking: Is that even safe?!

Protection from the elements

On keeping a cold-weather clothing log

I tend to put most of my helpful hints over there these days. My guess is you'll start seeing a lot more cold-weather tips.

Monday, June 22, 2009

Hotter than Death Valley.

This is Death Valley. A high of 93°F and no humidity to speak of.


This is Kansas City. A high of 94°F and humidity by the truckload.


A quick look at the 4:00 PM stats shows that the heat index was well into the three digits across the metro, peaking at 110 at the KC International Airport.


Several of my friends think I'm insane riding in this. Heat can be dangerous. If you pay attention to your body and you're prepared for it, it's not too big of a deal. I covered some more tips for Surviving Summer over at Bike Commuters. It's an addendum to my original Beating the Heat article.


What are you doing this summer to make riding more comfortable?

Wednesday, June 10, 2009

Tricks of the Trade: Hidden Paths

Earlier this week, Fritz posted a nod to a fascinating post on 5000 entitled "Bicycle Wayfinding in the Early 21st Century"

Interstitial spaces are those un-mapped, informal nooks, crannies, and shortcuts. Traveling off the grid. Cyclists who ride in urban areas are probably very familiar with these dark alleyways, parking garages, little paved paths or dirt alleys between urban homes and the like. If you don't, you should start keeping your eyes open for them.


I use interstitial paths almost every single day, and their ubiquity isn't limited to dense, urban streetscapes. Closer to home in suburbia, I cut through business parks...


... industrial complexes ...


... grassy public areas (even when it pisses Chris off)...


... and even church parking lots, parks, little paths between cul-de-sacs and the like. What do they have in common? You won't see any of them on any map. Even the paths that look like roads show up only on aerial view, but they're highly unofficial dead-ends on street maps.

Here in KC, Mark Thomas has shown me several really nifty shortcuts, including access paths under high-voltage suburban power lines, dried stream beds, aqueducts, drainage tunnels and a host of other un-seen infrastructure ready for use by people who don't feel the need to stay between the painted lines. That was two years ago, and he continues to show me more of them, but I quickly learned to look for them on my own.


Brian's post is long, but worth the read. It links to resources, makes statements and shows photos that I can't possibly rival here without flat-out plagiarizing the original work. I agree with almost all of it.

Knowing the ins and outs of these off-the-map routes is actually pretty important if you plan on getting around town efficiently without the use of a car. I'd argue it's just as important as knowing the "goldmine" lesser-traveled and safer through streets and maybe more important than understanding the transit infrastructure in your area.

Staying on the lookout for new paths you didn't know about is key. Dropping what you're doing for a few minutes and exploring a new potential shortcut is the best way to get started. Since bicycles blur the line between vehicle and pedestrian, use it to your advantage, within reason! That is to say tear-assing through granny's flower garden or bubba's back yard isn't recommended. As for the "Private Drive" stuff? I usually see people on their smoke breaks as I pass through. They're friendly and wave. After years of this, I've never caught any flack for it. The second I'm told to knock it off, I'll find a detour.

Brian got me thinking about cataloging some of these little byways. Maybe I will get around to that some day.

Tuesday, May 12, 2009

Tricks of the trade: Bike Repairs

My bottom bracket has been getting cranky lately. Pun intended.

Noisy bottom brackets, if you catch them in time, often just need to be taken out, cleaned up, greased and re-installed properly. This takes special tools, but they don't cost much more than having a bike shop do the job once or twice. In my case, I've got many thousands of miles on the original BB, but I've serviced the BB three times now.

Jobs like bottom bracket service might be best left to the bike shop if you're just getting started, but shops will often try to upsell you or get you to replace an otherwise functional part with a brand new one even if you don't actually need it.


It's not that I have something against bike technicians. Some of my best cycling friends are wrenches by trade or they're moonlighting at bike shops in their downtime. My frustration comes from the industry: bike repair doesn't pay the bills; selling new bikes and accessories is what brings home the bacon. The tools to install these accessories are the same ones to fix bikes, and repair is for the most part only provided as a service to keep customers coming back.

Even if bike shops are fair -- and some are much more honest than others -- this is busy season. Bike shops get backlogged. Those of us who rely on our bikes for more than leisure can't always go a week without our bike while it sits in queue to be looked at.

For these reasons, I feel that it's very important for utility cyclists, randonneurs, commuters and bike tourers to have a firm understanding of how to do some basic bike repairs. Start with easy stuff that doesn't require many fancy tools (like changing your inner tube out).

As you run into other minor problems (derailleur adjustments, chain replacement), do some research and see if it's something you can do yourself. Some good sites:

Bicycle tutor
Park Tool Repair
Sheldon Brown

As always, feel free to comment here or drop me a line via e-mail, and I can probably point you in the right direction if you feel like taking a crack at fixing your bike. They're actually pretty simple machines. They're modular, and bikes of a decent quality usually have a lot of standardized components.

In other news, I scored a bell from last night's event at Overland Park city hall. Not wanting to crowd my handlebars any more than they are (you might call me "Captain Dashboard"), I mounted it to my seatpost. It works just fine there.


Oh, and I had a spectator while I was working on the bottom bracket.

Tuesday, April 28, 2009

Tricks of the Trade: Rainy Commuting

Yesterday was my first truly rainy commute of 2009. I've ridden in some damp conditions and in sprinkles, but yesterday took all that to a new level with a day-long deluge that had waned into sprinkles by the time I got off work, leaving the roads with water rushing to the storm drains.

I've had a few people asking for advice on rainy commuting.

1st: Stay Safe
Visibility is reduced for both you and motorists. Make sure your lights work and use them even during the day. Reflective clothing is a bonus. Look ahead and ride slower if you need to. Stay diligent looking for road hazards. Water can obscure broken glass and road-debris, pot-holes, storm drains and other things you would normally avoid.

Painted or non-porous surfaces get very slippery when it's been raining. Use extreme caution when riding over expansion joints, manhole covers, road stripes (especially the wide "stop" lines), metal plates on the road and railroad tracks. This one gets me on occasion, as I'll explain in a bit.

2nd: Keep your gear dry
Most commuters haul stuff to and from work: work clothes, gadgets, papers, lunch and whatnot. That stuff doesn't do much good if it's wet. I use panniers with rain covers, but even those don't keep things 100% dry. You can buy waterproof panniers and messenger bags. I just wrap my sensitive stuff in plastic or use large zip-lock bags and re-use them until they're no longer waterproof. You have many options.

I also keep a complete spare change of clothes and a towel at the office for emergencies or in case I forget something at home. On seriously rainy days, I could just ride my bike and bring nothing along with me, then change into my dry clothes.

3rd: Comfort
Fenders keep rain from splashing up on your back and into your face and legs. Long after it rains, wet roads can make your commute miserable. Fenders fix that, and when it's raining, you'll get hit mostly by clean rain from the sky instead of experiencing the constant barrage of road grime -- that is until some car passes you and splashes it all over the place or you get stuck riding behind a cyclist without decent fenders.

You can buy specialty rainsuits, but less-expensive waterproof pants often get torn up quickly on a bicycle due to snagging in the chain and wear from the saddle. High-end gore-tex pants are expensive. I usually opt to let my legs get wet unless it's below 50 degrees outside.

Keeping a cheap $3 rain poncho around can help a lot when it's pouring like it was in Kansas City yesterday morning. It covers enough of your legs to keep your shorts from getting totally soaked. Combined with fenders, a cheap poncho is a good thing to have around. They're small and fit easily in panniers or backpacks.


I got my own taste of slippery metal yesterday:


I wasn't looking far enough ahead when I rode into that region. It's an expansion joint with two metal rails and a rubber pad between them. I have no clue why it's there. Once I'd crossed the perpendicular joint just past the paint stripe, it was too late to brake. The joint comes back across the road, which forced me to hit it almost parallel. My tire slipped, then fell into the groove. Fortunately, a little bit of road rash to the knee is the only bad thing that happened.

Of course, I've already written some stuff on how to handle road rash. After cleaning the wound, I covered it with Tegaderm and got on with my life. Tegaderm stands up to showering and covers scrapes with a breathable membrane that lets the healing process happen quickly and without scabbing.

Tuesday, April 14, 2009

So, you're thinking about bicycle commuting?

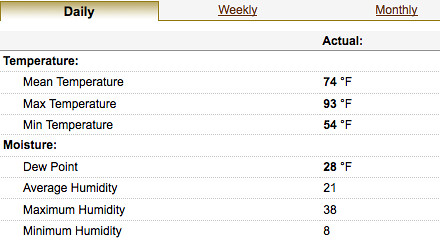
Although it was near freezing this morning when I left, it was also the first time in months that I've seen a sliver of the sun above the horizon as I left home. That means that "bicycle season" is upon us, and I won't seem so crazy anymore.

With the looming economic woes, many folks are looking at ways to cut back the budget, either to make ends meet or to increase the size of their nest-egg. Now is a great time to break out that bike and take it for a spin to work. It's the fun, healthy, and cheap way to travel relatively short distances!

The Facts

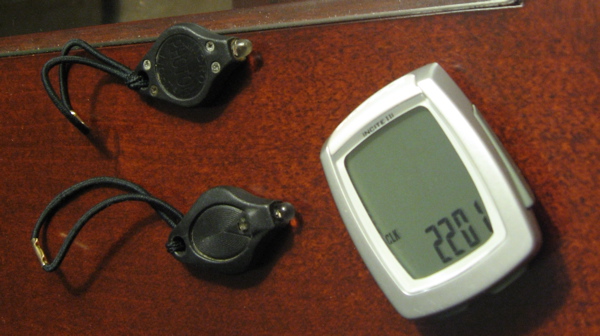
  • The average person will be about 4 times faster on a bicycle than they would be on foot for a given amount of effort. People who walk at 2-3 MPH can comfortably cruise along at about 10 MPH.
  • Almost anyone can ride a mile or two on a bicycle. It just takes some getting used to.
  • About 40% of urban travel in the US is within 2 miles. Again, most people can ride that far.
  • There are many proven benefits to getting 30 minutes of cardio workout per day.
  • You can get 30 minutes of cardio out of 4-6 miles of bicycle riding.
  • With a proper diet, you won't likely need to eat more food than usual for these distances.
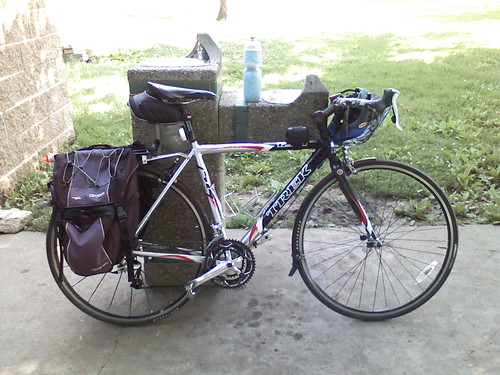
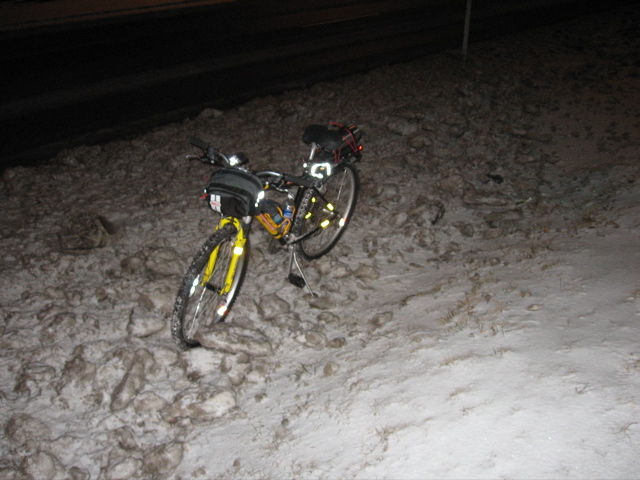
Bikes
It's all about comfort, but almost any bicycle will work fine for commuting a few miles each direction. Upright cruiser bicycles with fenders and chain guards are a popular choice for the urban bicycle commuter. Mountain bikes are cheap and plentiful, but don't do too well for longer distances. Road bikes, touring bikes and cyclocross bikes are popular for those who are used to weekend group rides, those who prefer a faster pace, or those who have longer commutes. A reputable bike shop should be able to help you decide on the right kind of bike.

If you've already got a bicycle that's gathering dust, why not have a bicycling friend or a bike shop look at it? If you're in the Kansas City area, I'd be happy to tune your bike up for you, and show you how to do routine maintenance checks. Just send me an email via the form on the right side of my website.

Accessories
Accessories are a personal preference thing. Feel free to eschew any of these if you don't think they're for you. Take helmets for example. After crashing WITH a helmet (and imagining how bad it could be without one), I usually opt to wear mine. Then again, I ride daily, sometimes as much as 29 miles round trip. I usually don't wear one when I ride to get groceries. That's a 2.5 mile round trip ridden mostly through parking lots and residential roads. The decisions are yours.
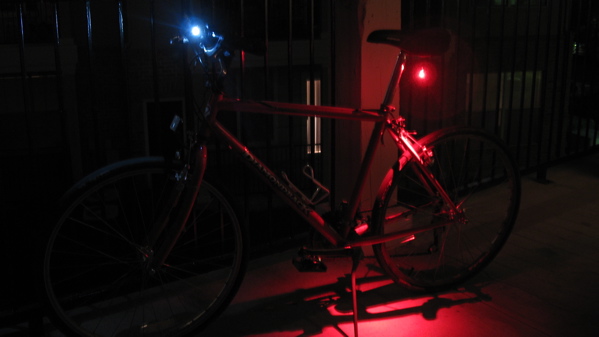
Lighting
In general, you will want some kind of lighting on your commuter bike. This will help grab the attention of the motorists, both oncoming and overtaking. The Planet Bike Superflash is a relatively inexpensive (and very bright) option for a tail light. It's what I use daily.

Headlights are a different thing entirely. They can basically be divided into two groups: "to see with" and "to be seen". The former group of lights are typically more expensive (yikes!) You really only need "to see with" lights if you intentionally ride in the early morning or late evening when ambient and/or overhead street lighting isn't enough to safely ride by. You can still find some relatively inexpensive lights to fit the bill here. Look for LED lights offering more than 140 Lumens (200+ is better) or Halogens offering more than 10 Watts (15 and up is better).

"To be seen" lights are usually flashing LED headlights. Many can be purchased for $25-$30. They are good to use in fog, rain, or toward sunrise and sunset. For this, I use an older 2.4 Watt halogen predecessor to the CatEye EL220.

If I'm recommending things to people who are just getting started, I recommend a "to be seen" headlight and tail light set. I wouldn't commute without them. Best of all, these less expensive lights are easy to find at almost any sporting goods store, or even the "bicycle shaped toy" aisle at big retail shops.
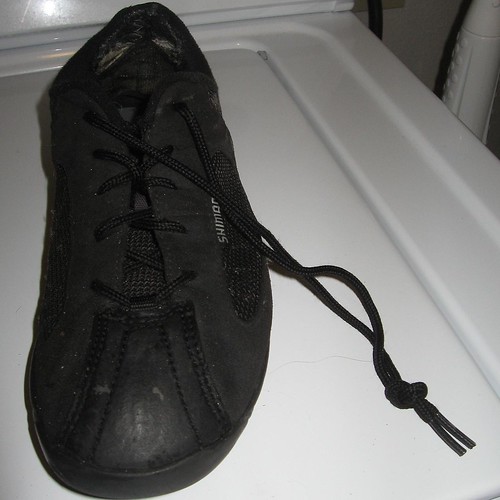
Reflectivity
Being seen, if you can't tell, is a bonus. Reflective vests, proper reflectors on your bicycle (front, rear, pedal reflectors and spoke reflectors) and other reflective items (Shoes with reflective material, reflective tape on your bicycle, etc) help you to be seen. Bicycling isn't about looking cool, so don't pretend. Be seen. This is more important for those who commute near dusk and dawn.

Cargo
This ties in with the next section, Logistics. Most commuters will have to carry stuff to and from work. Backpacks, panniers, cargo racks, trunk bags, messenger bags and handlebar bags are all viable solutions. You will have to choose what fits your needs and wants. It helps if your bicycle is compatible with the method you choose. Not all bikes are designed for cargo racks, for example; and wearing a backpack can be tricky whilst riding a recumbent.
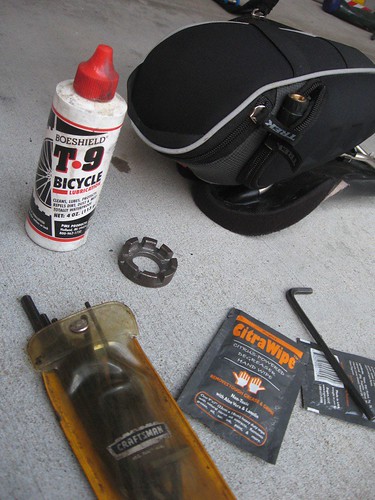
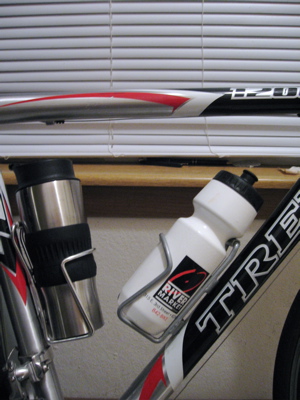
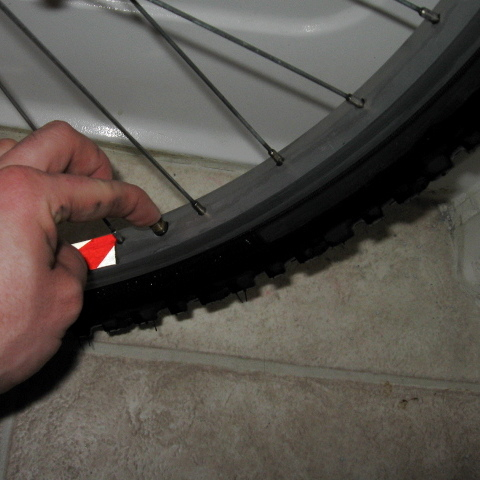
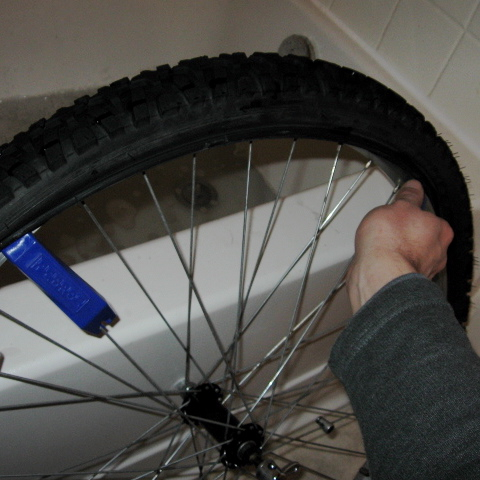
Creature Comforts
Fenders can keep puddles from ruining your day and when it's raining lightly, they keep road grime from giving you the Butt Stripe Of Doom. Water bottles or hydration backpacks help on longer commutes or in hot climates. A seat wedge with flat-tire repair stuff is nice to have, but only if you're comfortable fixing your flat tires. Sometimes, it's just easier to carry a mobile phone so you can have a friend rescue you from those situations.

Logistics
At work, you may need specialized clothing that may or may not be conducive to cycling. You may also need to take lunch, a briefcase, or other bulky items along. Take these into account when figuring out how you are going to make sure you get to work with everything you need intact.

Clothes
When the weather is nice, you can get away with riding a bicycle in business casual or even more formal clothes, if you only have a mile or two worth of riding. Use an ankle strap or roll the pant leg up to keep it from getting stained or caught by the chain. Alternatively, use a bicycle with a chain guard. A T-shirt beneath the work clothes you'd normally wear will keep you from pitting-out that office shirt so easily.

If you've got a little further to ride, you might encounter puddles or rain, or you'd just rather not risk putting wear and tear on your work clothes, you can opt to do a number of things:
  • Keep work clothes and shoes in your office
  • Carry some of all of your work clothes with you on the bike every day
  • Occasionally haul a few days of clean clothes to the office (by bike or by car)
Those are just a few examples. Depending on what else you need to carry with you, you can determine the appropriate cargo solution as mentioned above.

Multi-Mode
When the weather isn't too great or I don't feel too well, I ride my bike to the bus stop. Many metropolitan areas facilitate bicycles on their trains and buses. The full 29-mile round trip is definitelty longer than most people would consider a reasonable bike ride. When I include the bus, I ride about 5-6 miles per day. This combination of bicycling with transit provides a great deal of flexibility. I no longer need to worry about taking the bus to the same place my car is parked. I have a bicycle with me downtown to get around with, and parking is free wherever I go.

More questions?
Feel free to ask in the comments!

Tuesday, December 23, 2008

Tricks of the trade: Cold Psychology

Above all else, the primary thing you need to ride in temperatures that you perceive as "cold" is a willingness to expand your horizons.


This is not to say that someone who hung their bike up in September should just go on a sub-zero all-day epic in the midst of January. It is to say that "acclimating" to the temperature is mostly in your head. Jill and Doug aren't any more resilient than any other human being. They've just got experience, and they know what works for them because they bothered to give it a try. If you are Jill or Doug and are reading this, I'm sorry I gave away your dirty little secret.

Through experience alone, you figure out what works for you in the cold, so it's best to start venturing out for short periods of time or in "somewhat" cold climates, then expand your horizons as the weather gets colder, or start going out longer to determine where your weaknesses are.

Weaknesses can be in clothing:

  • too hot
  • too cold
  • a drafty seam in your favorite winter jersey
Weaknesses can be mechanical:
  • Drivetrain lubrication may be either too thick or doesn't protect from salt
  • The ratchet in an old freehub might fail to grab in cold temps
  • Your light's batteries might not last as long in the cold
Weaknesses can be mental, too. Those usually fade pretty quickly once you find out that you won't, in fact, die.

Tuesday, October 07, 2008

From the readers: Cold Weather Gear

I've started getting a lot of e-mails from readers regarding cold weather and suggestions for riding in it.

To those who've e-mailed me, I've pretty much covered this in my replies to you.

what works best for me isn't guaranteed to work that well for you. It depends on how hard you ride, how much heat you build up on your own, and how far you have to ride. Your best bet is to experiment. Here's what I use, though:

  • Below 50: A long-sleeve t-shirt under a short-sleeve. Long pants (cargo pants or jeans) over bike shorts. A headband to keep my ears warm and some light gloves
  • Below 40: A windbreaker over a t-shirt, long pants over thermal long johns and a balaclava (kind of like a ski mask) with some light gloves
  • Below 25: A thin coat over a t-shirt, long pants over long johns, a balaclava and heavier gloves
  • Below 10: A thin coat over a sweat shirt over a t-shirt, long pants over flannel pants over long johns, balaclava with ski goggles (keeps the eyes from freezing) and heavy gloves
  • Below 0: A thick coat, sweat shirt, t-shirt, long pants, flannel pants, long johns, two ski masks, ski goggles, and mittens. No, really. Mittens. Keeping the fingers together keeps them warmer.
People vary in their comforts, a lot. You've got people like Kate who I think bundle up quite excessively for temps in the high 40s. Lobster claws? Fritz took this photo last year and I asked him what the temperature was, commenting that I didn't think it got that cold in the bay area.

Then you've got people like Doug who overheat wearing a balaclava (ski mask) even with a -25°F wind chill.

Experimenting is simple. Just keep a log of the temperature and precipitation, then write down what you wore and how well it worked or how badly it sucked. Use that as a guide for the next time. I didn't log every single condition I've ridden in, but I keep track of especially great clothing combinations and I've found that any setup I use is good for about a 10 degree range.

Dressing in layers is great, especially if you have some spare room in your bags to store the layers if you need to peel them off. Additionally, I usually keep one light layer with me in case the temperature drops or I under-guessed the weather.

Your ideal clothing setup for cold-weather riding will probably feel a little chilly when you first get going. It doesn't take long to warm up, though. Dressing too warm can actually be worse than not dressing warm enough. If you're sweating excessively, you run the very real risk of hypothermia. You might be okay while you keep moving, but if you're soaked through your clothes and need to stop to fix a minor issue with your bike, you won't stay as warm and the moisture will quickly sap heat away from your body faster than you're generating it.

Adding or removing layers isn't the only way to regulate your temperature, though. You can also try putting some more effort into the bike if you start to feel chilly, or slow down a bit if you're getting too hot.

Wednesday, September 10, 2008

Tricks Of The Trade: Murphy's Laws (and how to deal with them)

1. If you're riding on a roadway that's been traffic free for a while, and you notice an oncoming car off in the distance, there is usually a car coming up behind you. Almost always, both cars will cross paths at the exact moment that the car going your way is attempting to overtake you.
I don't know why, but this "law" usually holds true. This is a dangerous situation for a number of reasons. If either you or the oncoming car must swerve for any reason, you are the one who has the most to lose. You'll either swerve into or in front of the overtaking car, or it will swerve into you to avoid collision with oncoming traffic.

2. Debris, pot-holes, cross-traffic, car doors opening into traffic, storm drain grates and other hazards usually appear in front of you out of nowhere while you're busy worrying about traffic behind you.
Again, if you're worried about what's behind you, you're not paying attention to what's in front of you. Many motorists will get angry that you're costing them precious of seconds of their lives. Many will honk, yell, or possibly even throw stuff at you. None of them want the hassle of dealing with the results of running you over, even if it's just a small court case and a slap on the wrist (which is likely all that's bound to happen, at least here in KC).

What's a cyclist to do?
Be mindful of what's behind you, but pay closer attention to what's ahead. You can change what's in front of you by re-positioning yourself and you're powerless over what's behind you. Motorists will not run you over intentionally! The number of truly malevolent drivers is almost nil. The number of inattentive drivers is pretty high. The best way to avoid these situations is to take the lane, be visible and force the traffic behind you to hold back until it's safe to pass.

  • Keep your sights far, far ahead.
  • Identify active threats (road hazards, traffic) and potential threats (intersections, parked cars) early.
  • If there are hazards or oncoming traffic, TAKE THE LANE instead of hugging the curb. If moving outward into the lane, I'll often signal as if I'm taking a left turn, simply to make it clear that I am moving to the left, and to grab the attention of motorists behind me.
  • Be seen. Reflective, bright-colored clothing and lighting make you more conspicuous and less likely to be a victim to inattentive motorists.
  • If riding with someone else, identify road hazards to others out of courtesy. Pointing to upcoming hazards, signalling to move left or right within the lane, and announcing overtaking traffic are commonplace on group rides, and applicable when commuting with other cyclists.
  • Maintain 360° awareness as you can, but not at the cost of what's ahead.
For some people, mirrors offer a good solution, allowing a cyclist to keep what's behind them in their peripheral vision. The occasional glance-and-scan technique works for me. The worst thing you can do, however, is focus on the car behind you, trying to make sure it won't hit you. At best, you should take a quick note of the car's road position and the presence of any turn signals. While motorists don't always signal their turns, if they do, it's a good idea to take note of it.

Creative Commons photo credit: "Traffic On El Camino Real" by our friend Fritz.

Wednesday, September 03, 2008

Tricks Of The Trade: Drying your grimy shoes

The past few days have been rainy. Today, I decided my shoes won't get dry by morning on their own.  When I have to dry them, this is how I do it.  I'm drying my bike shoes, but you can really dry any shoe this way, so long as they aren't susceptible to heat damage.

First, if they're really grimy, you might as well hose them off.  Run them under the bathtub faucet, use the kitchen sink sprayer, or if you're married, I guess take them outside and use the garden hose. Failure to do so MAY result in a night sleeping on the couch. That's okay, it's kind of like camping. 

Next, loosen the laces so that the tongue relaxes into the shoe for maximum air flow.  Tie both laces together in a small knot near the end.  Repeat with the other shoe.


Optional step: Remove the insole (if you can) and spray with febreeze or some other fabric freshener.

Next, hang the shoes on the inside of the dryer door, holding the knots at the top of the door with one hand, while closing the door with the other hand.


Voila!  The shoes will hang in the dryer.  They won't bounce around and get all beaten up, nor will they "kick" the dryer door open or make a lot of noise.  Run the dryer on high.  It might take longer to dry this way, but it's nicer on the shoes, nicer on the dryer, and a lot quieter.


If you have cycling shoes that don't have laces (ratchet strap and/or velcro closure) you can hang them inside the door the same way with craftily-re-bent wire hangers, knots in some twine, or any other creative solution you can come up with.  Using a dryer to dry shoes with plastic parts may cause deformities, so try this one at your own risk.

Sunday, March 23, 2008

Top 10: Tips for transportation cycling

I've been saying this for a while, but spring is practically here. With it comes "driving season" and increasing gasoline prices. More importantly, though, people are starting to wipe the dust off of their bikes and hit the paths. Whether you ride for fun every year, or you've not even sat on a bike in a decade or more, here are some tips to help you out if you plan on riding your bike instead of driving for some of your trips this year.

10) Learn basic bicycle maintenance. If you're replacing your car with a bicycle for some of your shorter trips, you will probably be riding your bicycle more miles than you used to, or you may be riding a bike for the first time in a while. Park Tool and Sheldon Brown both have excellent instructions for bicycle repair. Start with the basics: Cleaning and lubricating your chain, fixing a flat tire, or maybe adjusting your brakes and shifters. In the dead of summer, it might take a week to get your bike back from the shop if you take it in for a flat tire. You can fix it yourself with very few tools, and it's easier than you may think.

9) Get some tools. This goes with #10, but you should have enough tools to do minor adjustments to your bike. Honestly, I got by for almost six months needing no more tools than what came on the Park MTB-3 multi-tool. I keep it with me while commuting for road-side repairs.

8) Learn how to pick a good route. Don't think like a driver. Instead, think of lesser-known roads that may be a block or two away from the big roads you normally drive on. Think of little alleyways or sidewalks between cul-de-sacs, and how you can utilize multi-use paths. If in doubt, check out Veloroutes or other cycling map sites to see if anyone has plotted some good routes. You may also ask in the bike forums regional discussions to see if someone local knows some decent routes.

7) Logistics. Figure out how you're going to get yourself, your stuff, and your bike to and from your destination and stored safely, and get a plan laid out. This is mostly concerning commuting to work by bicycle, but you should also have some idea of how you're going to handle your errands if you should choose to do those by bike as well. Securing your bike, cleaning up if you get dirty or sweaty, and transporting your clothes are things to think about.

6) Take The Lane! Tim Grahl put together an excellent article outlining five reasons to claim the lane with your bike. I can't convey it any better than he did. By staying off of the main arterials, you usually avoid the necessity to use sidewalks. They still have their place for certain situations, but if you're not commuting on a bike path, you should probably be commuting out in the middle of the road where you can be seen.

5) Be visible. Bright colors. Reflective materials on you and your bike. High contrast. At least one bright, red tail light should be lit up even during the day. A second, blinking light is great, too. Headlights when it's dim outside, and a blinking front light even during the day is a good idea. Always, always have DOT-legal reflectors on your bike. There's no good reason not to. It doesn't matter how "cool" you think you look on your bike. To drivers, cyclists on the road all look dorky. Might as well go all out, right?

4) Don't skimp on the bike. I know this hurts to think about, but bikes you find at sporting goods stores, toy aisles of big-box stores and the like are sold and marketed as toys. Things that 100-pound 13-year-olds will ride for a summer and forget about. You wouldn't buy a Power Wheels to get you around town, would you? If you already have an old bike, there's not much harm in getting it fixed up and checked out. If you're going to buy a new bike, I recommend going to a specialty bicycle shop. If you can find a used bike cheap that the shop tech agrees will hold up to your riding, you could get away with spending under $150. Otherwise, consider the $350 price point "entry level" for new mountain and hybrid bikes, and $500 the entry level for new road bikes. You're shopping for a replacement vehicle, not a toy. If unsure, browse the new CBB Commuter Bikes Database for bike ideas.

3) Give yourself some time to adjust. It took me a few weeks to get my routine figured out and for my body to get used to riding a bike again.

2) Learn your local "village". Knowing all those little shops near your home, near your popular destinations (such as work, parks, etc) and along the way is a great way to find stuff that's easily reachable on a bike. You might be surprised by what is nearby. After looking around, I found that there are few places I need to go that are more than 2 miles from my home or office.

1) Stay motivated. Come up with fun goals or get a riding buddy to keep yourself motivated. Soon enough, you'll be hooked!

Thursday, February 28, 2008

Tricks of the trade: geeky transit schedules

About half (probably more) of my commute trips over the course of a year are bus-assisted in some way.  Sometimes I only wish to ride half the distance in the evening.  This is true on hot summer days (oh how I miss thee!)  Occasionally, I need to swing by the bike shop, bank, grocery store or hardware depot on the way home.  Sometimes I'm sick and just want to be dropped off within a quarter mile of my apartment.  Other times, I want to get home as early as humanly possible.  You get the idea.  On the days I use the bus, it's not always the same old grind.  The following was originally posted on Commute By Bike:


Bikes, Buses and Trains, oh my! My multi-mode commute can get confusing at times. I don't have one set bus route. There are 3 different bus routes and probably a dozen different stops I will use depending on errands I plan on running, the time I get out of work (road congestion taken into consideration) and distance I feel like riding from the bus to get home.

Anyone who relies on public transportation is at the mercy of someone else's schedule. I used to make frequent visits to the site containing bus route maps and schedules and I even thought about printing some of the schedules out to keep at home and at the office. A few months ago, a thought crossed my mind: With the latest PDAs, mobile phones, and trendy personal media players having the ability to display pictures, it's easy to store the schedules on them. I quickly took screen shots of my three most-used bus schedules and stored them on my mobile phone. Not only did I save paper and expensive ink, I now have the schedules with me virtually everywhere I go.

While I know there are quite a few tech-savvy writers and readers here, this tip isn't for everyone. It's easier than it sounds, though. After all, almost anyone can figure out how to use the camera on their phone, if they have one.

Method #1: Find the bus or train schedules online or in print somewhere, and take a close-up snapshot of your computer monitor or paper schedule with your camera-equipped phone. My LG Chocolate VX-8550 supports zooming in on images, so I can enlarge the image on my tiny screen to look at parts of the schedule in a readable fashion. If your camera phone doesn't support zooming, then get really close and take a few pictures that you can read as-is. Don't forget to re-name the files so you know what route they belong to!

Method #2: Find the schedule online, capture an image of it to your computer, then e-mail it or upload it to your device. This results in a much clearer image of the schedule to look at. If you have a Mac running OS X, you can hold Command-Shift-4 and draw a box around the schedule to save a screen shot to your desktop. If you're running Windows, I recommend AnalogX Capture, a free screen grabber. Of course, Linux/BSD/UNIX users get some love, too. The "import" utility that comes with the ImageMagick software package lets you save screenshots as well, almost exactly the same way as the OS X grab utility works. You will probably need to save the files in JPEG format for maximum compatibility with consumer electronics devices.


And yes, that's a Sun Type 5 keyboard and an IBM RS/6000 in the same photo. I don't want to hear about it. :P

Tuesday, January 22, 2008

Tricks of the trade: Caffeine On The Go

I know a lot of cyclists will berate me for this one, but every time I mention my portable French Press that fits in a bottle cage, it seems to drum up a bit of attention. Caffeine is hands-down the most popular drug in America.

It's been said that caffeine is a way to steal time from your older self. Caffeine users surpass smokers and alcoholics by a significant margin. Some people think Caffeine is evil. Others love it. I don't care where you stand on this argument, but I'll just tell you I'm on the "love it" side of the fence.

With that, my favorite way to enjoy coffee is via French Press. For the un-initiated, there are several ways to enjoy coffee. I'll outline 4 of the most popular ways:

  • Drip Brew. A filter full of coffee grounds sits in a basket. Water is heated from a resevoir and as it boils, it is forced up a tube and drips through the grounds. The filter keeps the coffee grounds from getting mixed in with the coffee you drink. The decanter below catches the coffee and is usually heated from below to keep it hot. This is probably how you get your coffee.
  • Percolator. Coffee grounds are located above a vat of heated water. The heater is located below a tube, forcing water up and onto the coffee grounds. The liquid works its way through the coffee grounds. This coffee-water gets recycled and run through the coffee over and over again until it is sufficiently strong. This is how small stove-top coffee kettles and large coffee urns work.
  • Espresso. Very fine coffee grounds have high-pressure steam forced through them, quickly extracting the flavor and caffeine from the coffee grounds. This is very strong and can be drank as-is, but is most often put in popular espresso-based drinks such as Mocha, Latte and Cappuccino.
  • French Press. Near-boiling water and coffee grounds are stirred together in a container and allowed to steep for a period of time (usually 3-5 minutes depending on desired taste, type of coffee bean, and coarseness of the grounds). After that time has elapsed, a plunger is pressed down, which forces a screen filter through the coffee. This pushes the coffee grounds to the bottom and separates them from the coffee beverage. At this point, you may drink the coffee. In a large French Press, it's often poured into a suitable drinking mug. On a small travel press, you can drink straight from the container if you wish. The coffee grounds will not brew any further once pressed to the bottom.


French Presses come in many different styles, but my favorite one for use on the bike is the Bodum Travel Press. It's made in stainless steel as well as insulated plastic. I opt for the Stainless since it should be more durable. It's also vacuum insulated and keeps coffee warm for a long time even in the single digit temperatures I have to endure on occasion.

I bought mine on eKitchenGadgets, which was iKitchen.com once upon a time. Here's a direct link:

http://www.ekitchengadgets.com/boststtrmug1.html

Also, Steven M. Scharf's Bicycle Coffee Systems website has a bunch of coffee/bicycle related information, including a bunch of links to special bottle cages and bicycle cup-holders for odd-sized travel mugs and regular travel mugs that happen to fit nicely in standard bottle cages. It's certainly worth a look.

Monday, December 10, 2007

Tricks of the Trade: Make your own studded ice tires

Okay. I did it. Just because. I found a great deal on some Kenda tires that I couldn't pass up, so I decided to butcher my old knobbies to see what exactly it's like riding on studded tires. This is highly unofficial and there's freezing rain outside as I type this. They'll get their maiden shakedown run in the next 12 hours.

Doing it is easy, but time consuming. I spent about an hour per wheel.

Before you get started, you'll need a pair of Mr. Tuffy (or equivalent) tire liners. I went with one size up from what's recommended because I wanted to make sure the liner would cover the screw heads.

Before you go gallivanting off to the hardware store, you need to to figure out where you're going to put the studs, and how many you'll need. I opted for opposing blocks on the tire shoulder in a zig-zag pattern. I then counted the blocks I intended to stud. In my case, I needed 68 studs per tire. This is a fairly tame stud pattern, which will place 4-5 studs into the ice at a time if I run the tires at 30 PSI or so. At 65 PSI, the studs won't even touch the pavement unless I'm turning. If I want some in the center block, it will require 102 total per tire, but I chose not to go that far just yet. This will vary depending on the tread of your tire and how aggressively you wish to stud it.

When you're buying screws, look for screws no longer than half an inch long (a little less might be preferable depending on your tires), and look for philips-head machine screws that have a flat face but a pointy tip.

You'll also need drill with a very small (less than 1/8") drill bit, and a screwdriver bit for your drill wouldn't hurt anything at all. This works best with a variable speed drill.

Finally, I recommend using some good leather gloves while doing the screw insertion and drilling. Be safe!

Now we can get started!

First, remove and clean your wheels and tires. Cleaning isn't really required, but all of my rolling stock was disgusting.

Then, deflate the tire:


Next, remove the tire from the rim. I really like the Pedro's levers. Note the tasty road grime and soap suds in the bath tub. I'm going to need to clean that up before my wife sees it!


Carefully and meticulously drill small holes in the tire where you plan on placing each stud. Consistency in placement and spacing is key.


Start threading each screw by hand. You should be able to see the little holes left on the inside of the tire from the drill bit.


Once you've started all the screws by hand, use a screwdriver or your drill to drive them in. Do not strip the tire rubber by over-inserting them, but don't leave the head standing out too far from the tire, either.

It should start looking like this


Once all the screws are driven into the tire, install the tire liner. This keeps the screw heads from abrasively wearing into your inner tube. It also holds the studs in place if they start getting loose.


Carefully install the inner tube and studded, lined tire back onto the wheel. Don't grab the studs! It'll hurt! Air them up and test them for leaks. If all's well, throw them on the bike and enjoy!


As with any modification like this, your bike will ride differently, so be sure to take it easy out there. Studs aren't meant for aggressive or high-speed riding. They're meant to keep you shiny side up. Riding with studs on hard, dry surfaces like pavement will decrease the life of the studs. It may also increase your potential to get a flat tire if the screw head eventually wears through the liner.


Update:
I put about 3/4 mile on them just now, and they work very well. They're not as noisy as I thought they'd be, and they're not totally slip-proof, but they're very, very confidence-inspiring, especially on level pavement with sweeping curves such as found on the apartment's communal ice rink jogging trail. Even 5% grade climbs and descents, while dicey, are do-able. Full report in the morning.

Wednesday, November 21, 2007

Tricks of the trade: Winter, the way I see it

By now, most of the people still riding their bikes for transportation in the northern 3/4 of the USA are what we call "year rounders" -- The cream of the funny farm, so to speak.

I'm not planning on continuing my full round trip during the winter months, and I've already started to slack off a bit as evidenced by my continued use of the bus during what some (including myself) would consider to be okay riding weather. As it get colder, though, and as snow and ice starts to form here in Kansas City, I'll look increasingly more hardcore to my peers. While this works fine for impressing people, I have to admit that I continue to ride a few miles to the bus each morning, even in the snow because it still makes sense.

Now it's time to explain:

Below freezing, the lead-acid battery in my car loses its potency as the chemical reaction slows down because of the temperature. I don't have the luxury of a garage. This means my car may not start. On the flip side, I stay indoors. My bike may or may not. Regardless, the engine starts every morning.

When it's cold out, so is my car. I can either sit in a freezing cold car and shiver for the first 15 minutes, bundle up really, really thick, and take some layers off once the car warms up (dangerous to do while driving), or let the car idle in the driveway, burning fuel for 15 minutes. On my bike, I can dress up in thinner layers because my body will heat up shortly after I start riding.

When it's been snowing or sleeting outside, I have to spend 10 minutes scraping my windows and cleaning off my car (while it's idling and using fuel, of course). This requires me to stand outside in the cold weather. Or, I can just hop on my bike and ride away.

On snow and ice, my car doesn't do so well, plus it could use a new set of tires. My SUV has four wheel drive with high and low settings as well as automatically switching on if I start to lose traction. It works most of the time, but it's not invincible. Other cars on the road can lose traction and cause traffic jams. Snow drifts taller than 18" can high-center it, and 4WD vehicles can still get stuck in the snow. My bicycle's knobby tires are surefooted on snow and on ice. When the road is blocked, it will happily navigate between vehicles or take to a narrow sidewalk with ease. If the snow is too deep even for a big SUV to tackle, I can still walk through or around it on my feet, carrying my vehicle with me.

Simply put, for short distances in the winter time, a well-outfitted person on a properly equipped bicycle is still the most robust way to get around. That said, you aren't likely to see me going on too many epic winter adventure rides this season, but we'll see.

Tuesday, October 23, 2007

Tricks of the trade: Coping with the chill

I'll apologize here for the length of this article. Hopefully, it's worth reading.

The blogosphere is always abuzz with cold-weather cycling information this time of year. Fritz posted this article about a year ago. Warren recently posted something similar on CBB as well. Indeed, this is the time when the dedicated bicycle commuters begin to stand out from the crowd. By November, most of the fair-weather cyclists have mothballed their bikes here in the midwest. This leaves only the year-round cyclists, most of which are commuters.

Of course, even the most die-hard bike commuters have their limits when it comes to weather. I'm going to take a different approach to cold weather cycling. Instead of attempting to tell you what to wear and what to ride, I'm going to tell you how to really find your winter groove.

Staying warm
Let's face it, there's a certain temperature that my body likes. It's probably not the same as your body. I may have more or less body fat than you -- I'd bet it's probably more. I may exert myself more or less than you do -- thus creating a different level of body heat. What works for me just wouldn't work for you. You're going to have to figure it out for yourself, but I'm here to help!

Experiment
In our case, the weather conditions are experimental variables beyond our control. Document them, and then document what clothing choices you made, followed by the results of your experiment. Keep track of your clothing and the results for the whole cold season. Each time you go out, see what worked best the last time you rode in similar conditions and look for refinements you can make based on previous annoyances or discomfort. Was your attire too cold? Too hot? Did it offer adequate protection from any precipitation you encountered? Was it just right? Could have used thicker gloves? Write it down!

This also gives you a great starting point to look at next year when it cools off. You won't need to dig through your memory or guess what will work well, although it will take some time to adjust to the cold again.

Here are some excepts from my own log. As you can see, I layer with plain clothes in cold weather:

62F - Jeans, wicking shirt under hoodie. Too hot.
49F - Long Thermals + t-shirt and shorts, hoodie taken off halfway to work. good.
47F/Rain - Cargo Pants, wicking shirt, windbreaker. soaked/cold lower body.
39F - Thermals, Cargo Pants, windbreaker, ski mask under nose. Just right.

Clothing and layering options
Head and hands rarely require layering, but a good balaclava or ski mask can be re-positioned to cover only parts of your face. Scarves and ear-warmers work well in certain conditions. Cover your hands, feet and head accordingly with some thick socks, gloves, a scarf, some ear warmers or a balaclava. In extreme temperatures, mittens or lobster-claws work better than gloves at keeping your fingers warm. Multiple layers of socks can keep your toes nice and toasty.

For the rest of your body, it's best to go with multiple thin layers. Some people swear by sweat-wicking base layers in the winter. If you play your cards right, you won't be doing a lot of sweating. You want to make sure that your outer-most layers can be removed, loosened or unzipped to allow some airflow.

Regulate your temperature
If you're getting too hot, you can either reduce your effort, unzip an outer layer, or remove a layer of clothing. I usually unzip or loosen my outer layer first, then remove it if that's still too warm. Unless I'm riding in the rain, I rarely rely on effort to keep from overheating. Opposite that, I will usually choose to ride harder if I'm getting cold to see if I can get my body warmed up a bit more. Failing that, I'll start adding more clothing to my body.

Stay dry
Staying dry should be your first priority when riding in cold weather! This includes using waterproof gear when it's raining as well as keeping sweat at bay. In temperatures below 40F (4C), avoid sweating as much as possible. When you're bundled up, there's not much air flow to help the evaporation process, and sweat can accumulate quickly. Wet clothes conduct your body heat outward toward the cool air. The moisture closer to the outside air evaporates quite nicely, cooling the clothing off and draining even more of your body heat. This vicious cycle can lead to hypothermia very quickly.

To combat rain or damp snow, the outer layer should be water resistant. To combat sweat, use the temperature regulation tricks mentioned earlier. The tricky part is keeping from sweating when you're wearing plastic rain-gear. If you open the jacket, you'll get wet. If you don't get ventilation or cool off, you'll sweat yourself into oblivion. I recommend dressing a little thinner than usual in rain, then rely on varying your exertion to stay comfortable. Keep an extra layer handy and dry, just in case.

If you find yourself already sweaty, it's best to take off a layer of clothing to cool off while you're still exerting yourself. Once dry, use layers to control your temperature. It's far more desirable to feel chilly for a while to get dry, then warm back up than it is to remain warm with damp clothing. If you have to stop while you're damp (for example, to change a flat), you'll be in in danger.

Finally, I'd recommend keeping some extra layers of clothing at work. You never know when the temperature is going to change in the middle of the day. This also comes in handy if you can't seem to get your clothes completely dry before it's time to go home.

Equipment
All the clothing in the world won't help a bit if your bike isn't up to the task. Having a bike that's set up for your conditions is paramount to your success as a year-round bike commuter. Everything changes in the colder months. You may find yourself commuting both directions in low-light conditions. The pavement might be dry in the morning and covered in glare ice or 8" of snow for your ride home.

Choosing your bike
Aside from the obvious question on tire choices -- which I'll get to in a bit, the winter can cause problems with bicycles. Rim brakes can become hard and wet, drastically reducing their abilities. Disc brakes don't suffer as badly from this kind of thing. Ice can accumulate in the shifters and cables, causing shifting and braking woes. Snow can get jammed into the gears and derailleurs, causing erratic shifting, skipping and binding issues. Bikes with internally-geared hubs and coaster brakes are less prone to these problems, but far from immune. Cold temperatures can freeze the grease in your rear hub and cause the freewheeling mechanism to quit working entirely. If this happens, you'll pedal the cranks but your wheel won't move at all.

You may consider trying to ride a fixed gear bike this winter if you have one. Although I don't have one, fixies seem to be immune to most of the winter woes I can imagine. You can brake with your feet applying reverse-pressure to the pedals if the brakes fail or the cables freeze. There are no shifters to get frozen. There are no derailleurs to get jammed. There's no freewheel to malfunction. On top of that, you have more control over your traction. Many people don't have the luxury of multiple bikes to choose from. If you're surfing craigslist or bike shops for a winter bike, you might want to take some of these options into consideration. My used hardtail 28-speed mountain bike worked just fine for me last winter, all the way down to -3F. Bicycle choice isn't the most important factor unless you're really in the market for a dedicated winter beater.

Keep it clean
Ice, salt, road grime, slush and sand are the worst enemies to your bike in winter. On top of the jamming and freezing issues I mentioned above, these adversaries will rust, grind, and destroy your chain and cogs. If you're riding a steel-frame bicycle with some scratched paint, these elements can cause rust to form on your frame as well. Make sure to keep your bike cleaned and well lubricated. Find a good lubricant that keeps water and grime off of the drive train. Last winter, I had good luck with a few different wax-based chain lubes. Fenders will not only keep your bike from slinging snow and grime onto you while you ride, but will guide the muck away from your bike's critical drive train components. Sometimes the best cleaning you can do is not getting stuff dirty in the first place.

Keep the rubber-side down
Some people can ride lightly-treaded road bike tires through snow and slush. This carries some merit, as the narrow tires have a better chance of cutting through the snow and making contact with the pavement. Others would rather have wide, knobby tires that can float on and grab the snow, slush, and mud for traction. Some parts of the world don't see much snow, but encounter freezing rain and ice storms where ice-studded tires are practical. Some people can ride on slick ice using normal tires without losing their balance. I can tell you that studded tires can be more trouble than they're worth unless you live where there's a lot of ice. They don't grip snow any better than cheaper tires made for mud. Furthermore, they make for an uncomfortable, heavy, and noisy ride on bare pavement.

There are simply far too many variables in weather, tire design, and rider capability to tell you how to ride on less-than-ideal surfaces. Much like clothing choices, you need to experiment.

Winter is one of the few instances where I condone using sidewalks -- even if it's just to get the feel for your bike's winter handling capabilities. On top of that, you're less likely to be hit by a car that loses control. As always, take extreme caution on sidewalks and realize that cars might have trouble stopping for intersections. You'll likely have to ride slower on top of being more careful and observant. Last winter, I would often pass traffic on my bike while using the sidewalk. Motorists would attempt to use brute force to get moving from a stop, or would lose traction going up slight inclines. This caused widespread traffic jams and backups. It's times like those when it's just less hassle to use the sidewalk.

See and be seen
Lighting is crucial. On top of darkness taking up more and more of the day, it's very difficult to see or to be seen when it's raining or snowing. Invest in a high-visibility vest with reflective material and good, bright headlights and tail-lights. You can spend $30 on a decent set of LED head/tail lights that are pretty good for getting motorists' attention but offer little in the way of illuminating the path before you. If you're commuting under street lights, this is probably sufficient. If you have some dark parts on your commute, you'll likely want to get a higher-end LED, Halogen or HID headlight. On slick surfaces, the ability to spot obstacles further ahead becomes very valuable.

Evolve and adapt
As you proceed through the winter, you will probably think of or see things that will make your winter bike commuting life easier. Ride as often as you can until you can't cope with certain conditions, and then figure out what it will take to conquer that barrier next time you encounter it. Maybe you need to buy a thicker balaclava or some ski goggles to get you through those really bad sub-zero days. Maybe you're geared up for snow but find your attire selection lacking in protection from rain. Whatever the case, you don't need to spend a lot of money right away to get into all-weather commuting. Take baby steps and face your demons one by one.

In closing
The benefits of year-round commuting are many. First off, you'll have an advantage over the fair-weather cyclists next spring. I have also found that in the 15-20 minutes I would spend scraping snow off of my car and letting it warm up, I freeze my tail off and waste a ton of gas. In those same 20 minutes, I can be to the bus stop a few miles away, nice and warm as I push the pedals on my bike. Then, there's the respect (or fear for your mental state) that you get from co-workers as you hang your bike helmet up and dust all the snow off of yourself while asking them if they were actually crazy enough to drive through that kind of weather.

If you're on the fence over whether or not to brave the winter this year, I urge you to give it a shot. You can always retreat to "plan B" if it doesn't work the way you wanted. Remember, there's no shame in admitting defeat against weather that you feel is simply too treacherous or unpleasant. Many people chickened out when the leaves started falling off of the trees!

Sunday, October 07, 2007

Tricks of the trade: Backup Lighting

Here in the US, it's autumn and we're losing daylight quickly. It's staying dark until later in the morning, and nightfall is happening earlier every day. Those of us who were commuting by bike in full daylight just a few months ago are left with only a few options if we wish to continue riding to work: Leave later in the day, or use some really good lighting... but what if your lighting goes south?

Battery runtime and power output are reduced in the cold. Bulbs burn out. Blinky lights can fall off and get lost or simply break. What if you're out in the dark longer than expected? These are only a few of the reasons that your lighting might fail. While it's no secret that I might go a little overboard on safety, do you really want to be riding in the dark without being seen?

My usual lighting setup is a NiteRider Evolution rigged with a 15W bulb as opposed to the 10W stock bulb. This system can only deliver about 90 minutes of full brightness, and another 15 minutes of usable-yet-dimming light. This is usually more than sufficient for my hour-long morning commute in the dark. On the back, I use a helmet-mounted Blackburn Mars 3.0. My road bike also has a permanently-mounted Trek DiscoTech on the rack. The Mars is very bright, but requires a small screwdriver to open. When the rechargeable AAA batteries I use get low, the Mars falls on its face in a hurry. It still flashes, but takes a severe nose-dive in brightness and it becomes useless pretty quick. In foul weather, I won't be using the road bike, so the rack-mounted tail light won't be there to help me out.

The two small flashlights shown above with my Trek Incite 11i for size comparison are my backup lighting solution. They're Photon MicroLight IIs. I purchased one with a red LED back in 1996 or so when they first came out so that I could easily read star charts with my dad, and for camping. The light is bright enough to be usable as a walking flashlight, but a good red color to not destroy your night vision. The white LED one I got for free from the Dis.org crew at the DefCon convention in Las Vegas in 1997. They feature replaceable batteries and a functional on-off switch as well as a squeeze mode, making them pretty versatile. They handle getting wet but I wouldn't use them under water. They can go for days on a battery, so they stand up to hours of use at a time and can last years with regular use between battery changes. Each of these lights is probably on its third or fourth battery replacement, not bad for 10 or 11 years old.

When I started bicycling a year ago, I started carrying the white one with me to use in case I needed to get the chain put back on my wal-mart beater bike or make some other impromptu adjustment. It wasn't long before I found out that tying some old hair elastics onto both lights would give me functional but worst-case-scenario lighting that could easily be attached to my bike.

Other options are carrying a spare bulb and batteries for your lights or buying some compact bicycle-specific lighting such as the Knog Frog lights. I personally think that carrying spare batteries just for an emergency is a bit cumbersome, and to make matters worse, my Mars 3.0 requires a small screwdriver to open. The philips-driver on my Park MTB-3 is too large, so that would mean carrying a small screwdriver as well. That's a deal-breaker. Solutions like the Frog or my MicroLight II will easily tuck into your jersey pocket or seat-bag with your flat repair gear.

Poking around PhotonLight.com's Keychain Lights, there are some other options that might be more cost-effective for you. The X-Light, for example, is cheaper than the MLII and has the ability to strobe. I'm not getting paid to push their products, but I've been a satisfied user of their products for more than a decade.

Here's a parting photo of my emergency lighting on my Diamondback Outlook. When wrapped around my seat's frame rails, the red light flails all over the place while riding. When seen from behind, this is very eye-catching. The MicroLight LEDs are visible from a wide angle, which helps too. The white LED is definitely more of a to-be-seen light and a pothole spotter than anything else. If I had to resort to this setup, I'd need to ride very slowly and limp home unless there was adequate street lighting available.

Wednesday, August 15, 2007

Tricks of the trade: Beat the heat

Photo: Disappearing Road, courtesy Brent Danley.

This is a familiar sight for many of us this time of year. We're subjected to sweltering heat that feels like a sticky steam sauna, sun rays broiling us from above and radiant warmth scalding us from below. These conditions are not only trying, but they can be very dangerous as well. This is the polar opposite of navigating ice and snow while fighting hypothermia. Many a cyclist retreats on days like this. Here are some tricks of the trade to keep you safe and healthy when Summer is in full swing.

It's getting hot in here!

Our bodies are designed to operate at a tepid 98.6 degrees Fahrenheit. When the brain heats up to 101 degrees or so, disorientation, dizziness and nausea can set in. A few degrees more and you're completely delirious -- incapable of making rational decisions. This often results in a downward spiral of poor decisions that may result in death. For this reason, it's really important to keep your cool and stay safe in the sun.

You are likely starting to experience heat exhaustion if you start to feel dizzy, confused, crampy, sleepy, or not motivated to keep riding. Other symptoms include lack of sweating, nausea, headaches, blurred vision, difficulty breathing or debilitating fatigue that turns headwinds and small hills into seemingly impossible challenges. This is a trivial condition in and of itself, but only if caught and addressed early on. It can quickly advance to what's known as heat stroke, which can make you loopy or unconscious, either of which places you in nearly imminent peril.

Perspiration and hydration
Our bodies are designed to regulate temperature by means of evaporation. When we sweat, water evaporates and reduces the temperature of our bodies. In humid air, this process is less effective. Some quick research on the Internet shows that a person can lose as many as three or four liters of water per hour through perspiration. Along with that, electrolytes are also lost and calories are burned as well.

Replacing these fluids will keep you sweating, which will help cool you down. Your body absorbs cold fluids easier, so ice water is a great start to reduce your temperatures internally as well as providing fluids for evaporative cooling. Drinking plain water is a good start, but you also lose electrolytes through your sweat glands. Electrolytes keep the brain and nerves working properly while fighting off cramping muscles. Chlorides of Sodium and Potassium are the big dogs here. I personally drink both water and an isotonic sports drink. Isotonic drinks contain approximately the same level of salts found naturally in your body. They replace salts lost through sweating. Examples of isotonic drinks are Gatorade, Hydr8, Powerade and the like. Replenishment is just as important as rehydration for longer rides.

Heat Accumulation
Sometimes, sweating and hydration aren't enough to keep you from overheating. As I mentioned earlier, sweating is not as effective at cooling your body when the air is humid. This is because the air can only absorb so much moisture. If it's already got quite a bit of moisture in it, your sweat won't evaporate as easily. Pavement is dark in color, and can reach temperatures upwards of 140 degrees; This doesn't help matters at all. Finally, bicycling and other physically strenuous activities generate internal heat in the muscles. This warms the blood and your overall core temperature. If evaporative cooling and the intake of cool liquids is losing the temperature battle against internally-generated, radiant, and ambient heat, you will suffer from heat accumulation.

Options for temperature regulation

The obvious way to cool down is with ice or cold water. Pouring some on your head or stashing ice in your jersey pockets are popular options used by riders on longer bicycle rides. Frequent stops at convenience stores can be made to restock your ice. If you wish to stop and use ice or water to cool off, make it count. The head, neck, armpit, rump, and groin areas areas are some of the best places to provide active cooling for. There is a lot of blood flowing through those areas.

Warren swears by the "misaligned sprinkler" method of cooling. Look for lawn sprinklers that spray onto the road or sidewalk and time your approach so that you'll get a little bit wet. Ground water is often between 50-60 degrees. It will feel like ice cubes hitting you, which probably feels both good and bad at the same time. Similarly, you could just pour cold water on your head while rolling. Just make sure to save some for drinking! Remember what I said about making poor decisions when you're overheated.

If there isn't anywhere to gather ice or water, you can choose to stop in the shade. Wandering off the pavement and under a tree will provide several benefits. First and foremost, you're not exerting yourself. You also get out of the sun as well as getting away from the hot pavement. Take your helmet off when resting. This will allow the sweat both on your head and inside the helmet to evaporate and cool off a bit. Shade can be found under bridges or overpasses, in deep ditches. In a pinch, you can form a shade barrier by draping your jersey over your bicycle's frame or hide in the shadow of your panniers for a few minutes.

Sunburn
"Ladies and gentlemen of the class of '97: Wear sunscreen." (Sorry, I had to say it)

On a serious note: with summer comes sun, and lots of it. Now that it's the middle of August, it's a little late in the game to be talking about avoiding sunburn but it's worth mentioning that wearing sunscreen (SPF-30 or higher) and sunglasses will provide many benefits beyond keeping you from looking like a lobster when you get home from work. It doesn't take long to get a first-degree burn from the sun. A second-degree burn with blisters can happen in under an hour. Play it safe, and wear sunscreen. There are sport-specific sunscreens out that do not run or wear off as easily while sweating or swimming. Although it's expensive, I use Coppertone Sport SPF-50. It stays on my skin and out of my eyes while it protects me. I couldn't ask for anything more.

Reduce your exposure
There is no shame in mixing it up a bit with transportation modes. Drive, carpool, or take public transit half way. If you use public transit, you can ride the whole way to work in the morning, but use a bus, train, or subway to avoid some of the heat and get you closer to home.

Shift your work schedule. Around here, the 5:00 and 6:00 hours are the hottest. It also seems like that's when most people are on their way home. You may see if your boss will allow you to come to work earlier or later so that you can ride in cooler temperatures. You'll also likely avoid some rush-hour traffic.

Have your own suggestions for beating the summer heat? Post your comments!

Monday, August 06, 2007

Tricks of the trade: So Fresh and So Clean

One of the things that keeps people from riding their bikes to work is the sweat factor. How does one combat the sweat, the body odor, the helmet hair, and all that mess?

This isn't such a big deal if you're riding your bike to work construction, or you'll be outdoors or otherwise getting hot and sweaty all day. Those aren't the kind of people who are letting sweat and lack of cleanliness hold them back, either.

Plenty of would-be bike commuters have to be dressed in business casual (or more formal) attire. Accountants, programmers, businesspeople, managers, secretaries are among them. Not smelling like a primate usually goes with the territory, too.


Locker rooms and showers
Some employers have showers and locker rooms for associates to use. This is commonplace for "green" companies that actively support alternative transportation to work, as well as companies who have a workout center on-site. Other times, you may be able to pick up a membership to a nearby gym or fitness center to accomplish this task -- with the added benefit of being able to cross-train and get a better total-body workout before or after work, or over lunch.

That's great, but...
What about those of us (like me) who don't have showers or locker rooms, and don't really wish to buy a gym membership? There are two health clubs within walking distance of my office. My apartment complex offers a 24-hour fitness center, pool, and hot tub to all residents. Paying for a gym membership downtown just for a shower would be a waste of cash.

Let's face it. Not all of us have a hot shower accessible to us, and some do not have the means nor the desire to buy a gym membership. There are a few different options for the rest of us.

Plan "B"... for Baby Wipes!
Baby wipes?! No, I'm not joking. Not all of them smell like baby powder, either. Baby wipes have a mild soap solution, sometimes with aloe, alcohol, or other cleansing or moisturizing agents as well. They do a good job of absorbing sweat and killing the germs that can cause body odor.

You can quickly dart into a handicap bathroom stall, take off your sweaty clothes, wipe down with a few baby wipes (face, arms, underarms, chest, and *ahem* anywhere else sweaty), apply some deodorant, cool off for a few minutes, and put your work clothes on. Go to the bathroom sink to splash some water through your hair and style it as needed. Use hair spray or other hair products if that's your thing. A small hand towel is nice to have, to blot your face if you're still sweating.

A small valet bag with wipes (in a resealable sandwich bag), deodorant, hair product, a small towel and a comb is often all you need.

The art of the sink shower
My personal favorite method of preparing ideally requires an isolated bathroom -- preferably with a locking door. The only supplies needed in addition to the above list is a wash rag and possibly your own soap (liquid or bar form) if you don't feel like washing off with the hand soap supplied in the bathroom.

Get into your birthday suit. Soak the wash rag, soap it up LIGHTLY, and scrub down. Rinse the rag out. Wipe the soap off; this may take a few rinses of the rag to accomplish. Use the hand towel to dry off. Cool down and hop into your work clothes. Fix your hair, and that's all there is to it.

Some final thoughts
If your head got ultra-sweaty on your way to work, you may wish to run some handfulls of water through it to rinse out the sweat and cool your head before you start the other parts of your preparation. Similarly, you can avoid a few extra steps if you have really short hair or none at all!

What do you do with the wet washcloths and towels? You can wring out the washcloth really well. Both the cloth and towel air dry by hanging them up somewhere. A warm place such as a utility/boiler closet, or laying on top of your warm computer monitor will work, just make sure they're dry enough to not drip any water on electronics first! This method also works for drying out your cycling clothes.

A really small baggie with minimal supplies is all you have to worry about, and the trade-off is huge. You could pack these supplies in a lunch bag or in a freezer storage resealable bag, or tuck your cleaning stuff into a jersey pocket. I personally use a small valet bag in one of my panniers.

In conclusion: If you have a place to go to the bathroom, you have a place to clean yourself up before work. Don't let summer heat and sweat keep you from experiencing the benefits of bicycle commuting!

Privacy Policy

This site is driven by software that uses third-party cookies from Google (Blogger, AdSense, Feedburner and their associates.) Cookies are small pieces of non-executable data stored by your web browser, often for the purpose of storing preferences or data from previous visits to a site. No individual user is directly tracked by this or any other means, but I do use the aggregate data for statistics purposes.

By leaving a link or e-mail address in my comments (including your blogger profile or website URL), you acknowledge that the published comment and associated links will be available to the public and that they will likely be clicked on.